Passive Solar

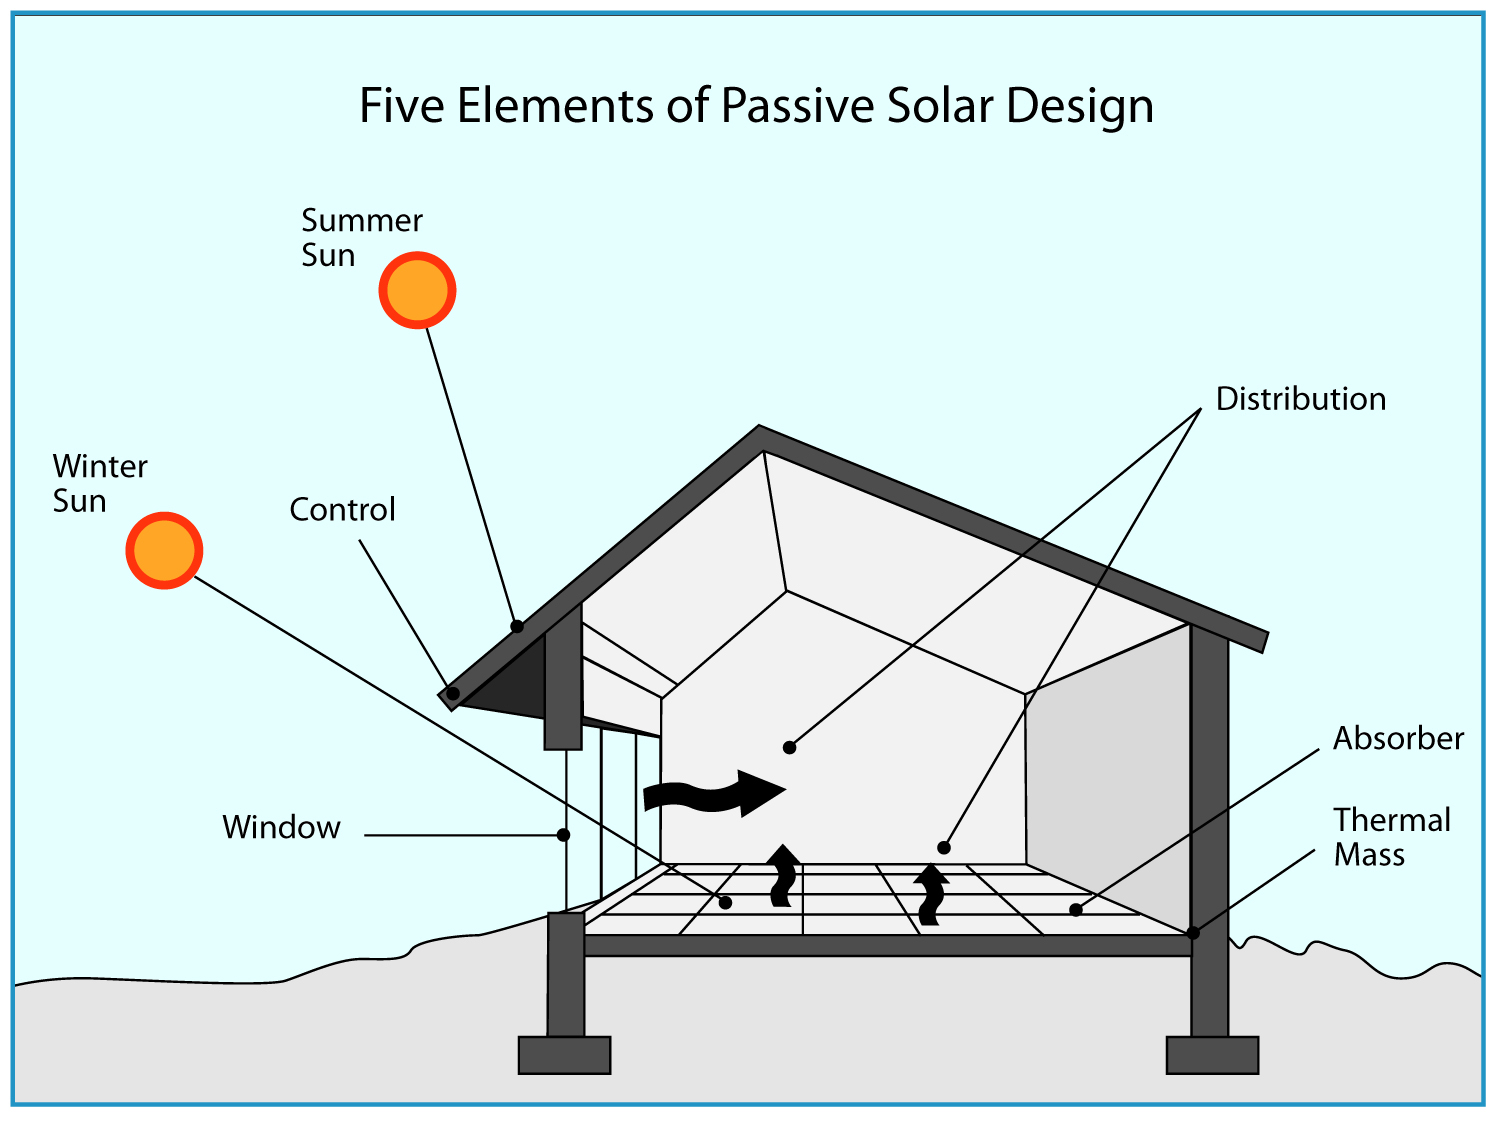
Passive Solar refers to a design strategy by which a house harvests the winter sunlight for heating. Because the sun is much lower in the sky during winter months (solar elevation is 22 degrees in winter but 67 degrees in summer), carefully calculated roof overhangs can allow south facing windows to be exposed to the sun during winter months, yet remain shaded during summer months. A thermal mass (usually in the form of a concrete floor or wall) is used to store the heat from the sunlight, which it then radiates as indoor temperatures begin to cool off at night.

How to use passive solar design to improve your home's natural lighting and regulate temperature for indoor comfort.
The basic principles of Passive Solar design

My site location did not allow me to contemplate a completely passive solar design. I had to account for many days (or weeks) in a row of cloudy or snowy weather. Also, I had pine trees partially obscuring the sun in winter months. However, I did try to incorporate passive solar elements in order to reduce the amount of mechanical heating the house would require. It also allowed me to include a large bank of windows on the southern facade with no “energy penalty”. Although my windows were R5 (good for a window), they have almost no insulating value when compared to my walls at R37. But with the added heating benefit of winter sunlight, they made up for this deficiency in insulation value. So 41% of my glazing is on the south wall.

sketchup_shade
Using SketchUp and Google Earth, I was able to model exact shading at any time of day, and any day of the year.

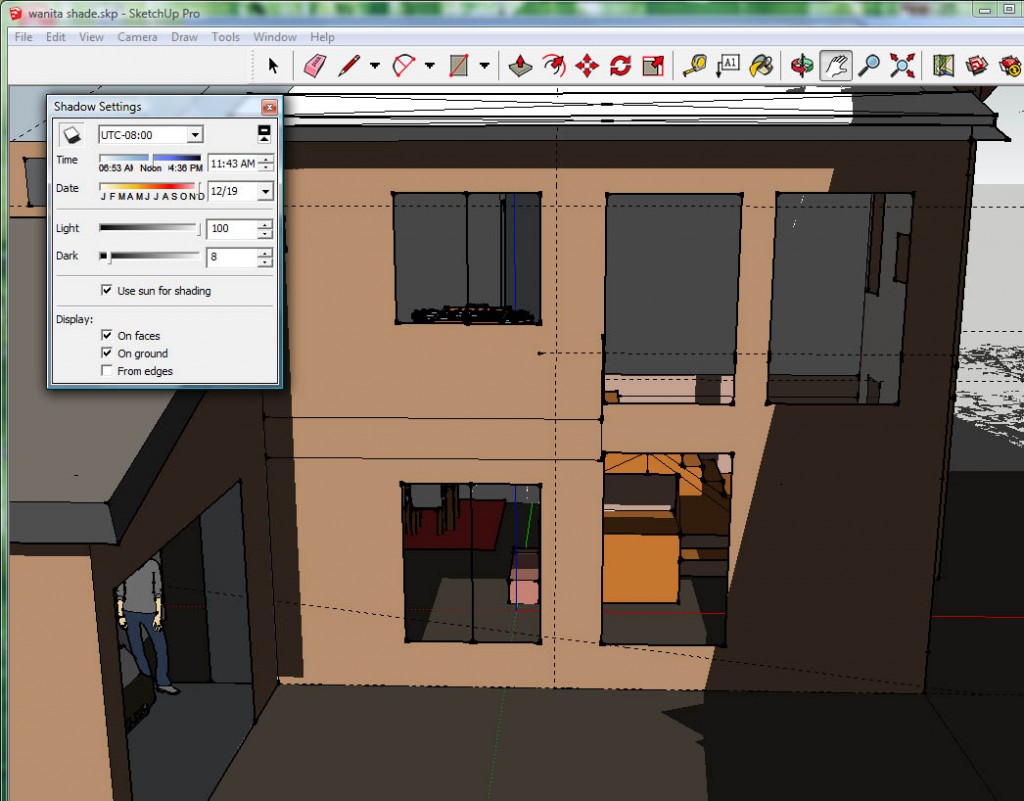
In order to position windows and design an effective roof overhang, I designed a simple model of the house using a CAD program called Sketchup. Then, by “placing” the model on its exact location inside Google Earth, I was able to see how the sunlight entered through windows at various times of the day during different months. This allowed me to carefully position windows and size the roof overhang above them to achieve optimal sun exposure.

Windows

Window glass is naturally transparent to visible light and high frequency solar radiation (ie, heat). However, these days most energy efficient windows have special Low-e coatings that reflect heat, so they keep the heat from the sun out, and the heat from the house in. I selected a special glass coatings for the windows on the south facade with high Solar Heat Gain Coefficients (0.62 center of glass measurement), to allow as much solar heat through the windows as possible. This coating still reflects low frequency radiation back into the house, yet is mostly transparent to high frequency solar radiation

Thermal Mass

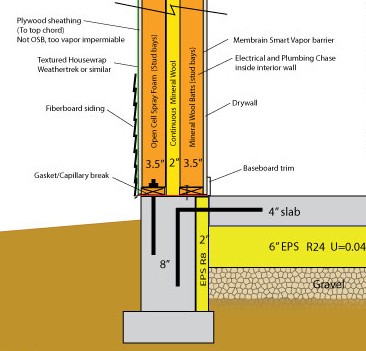
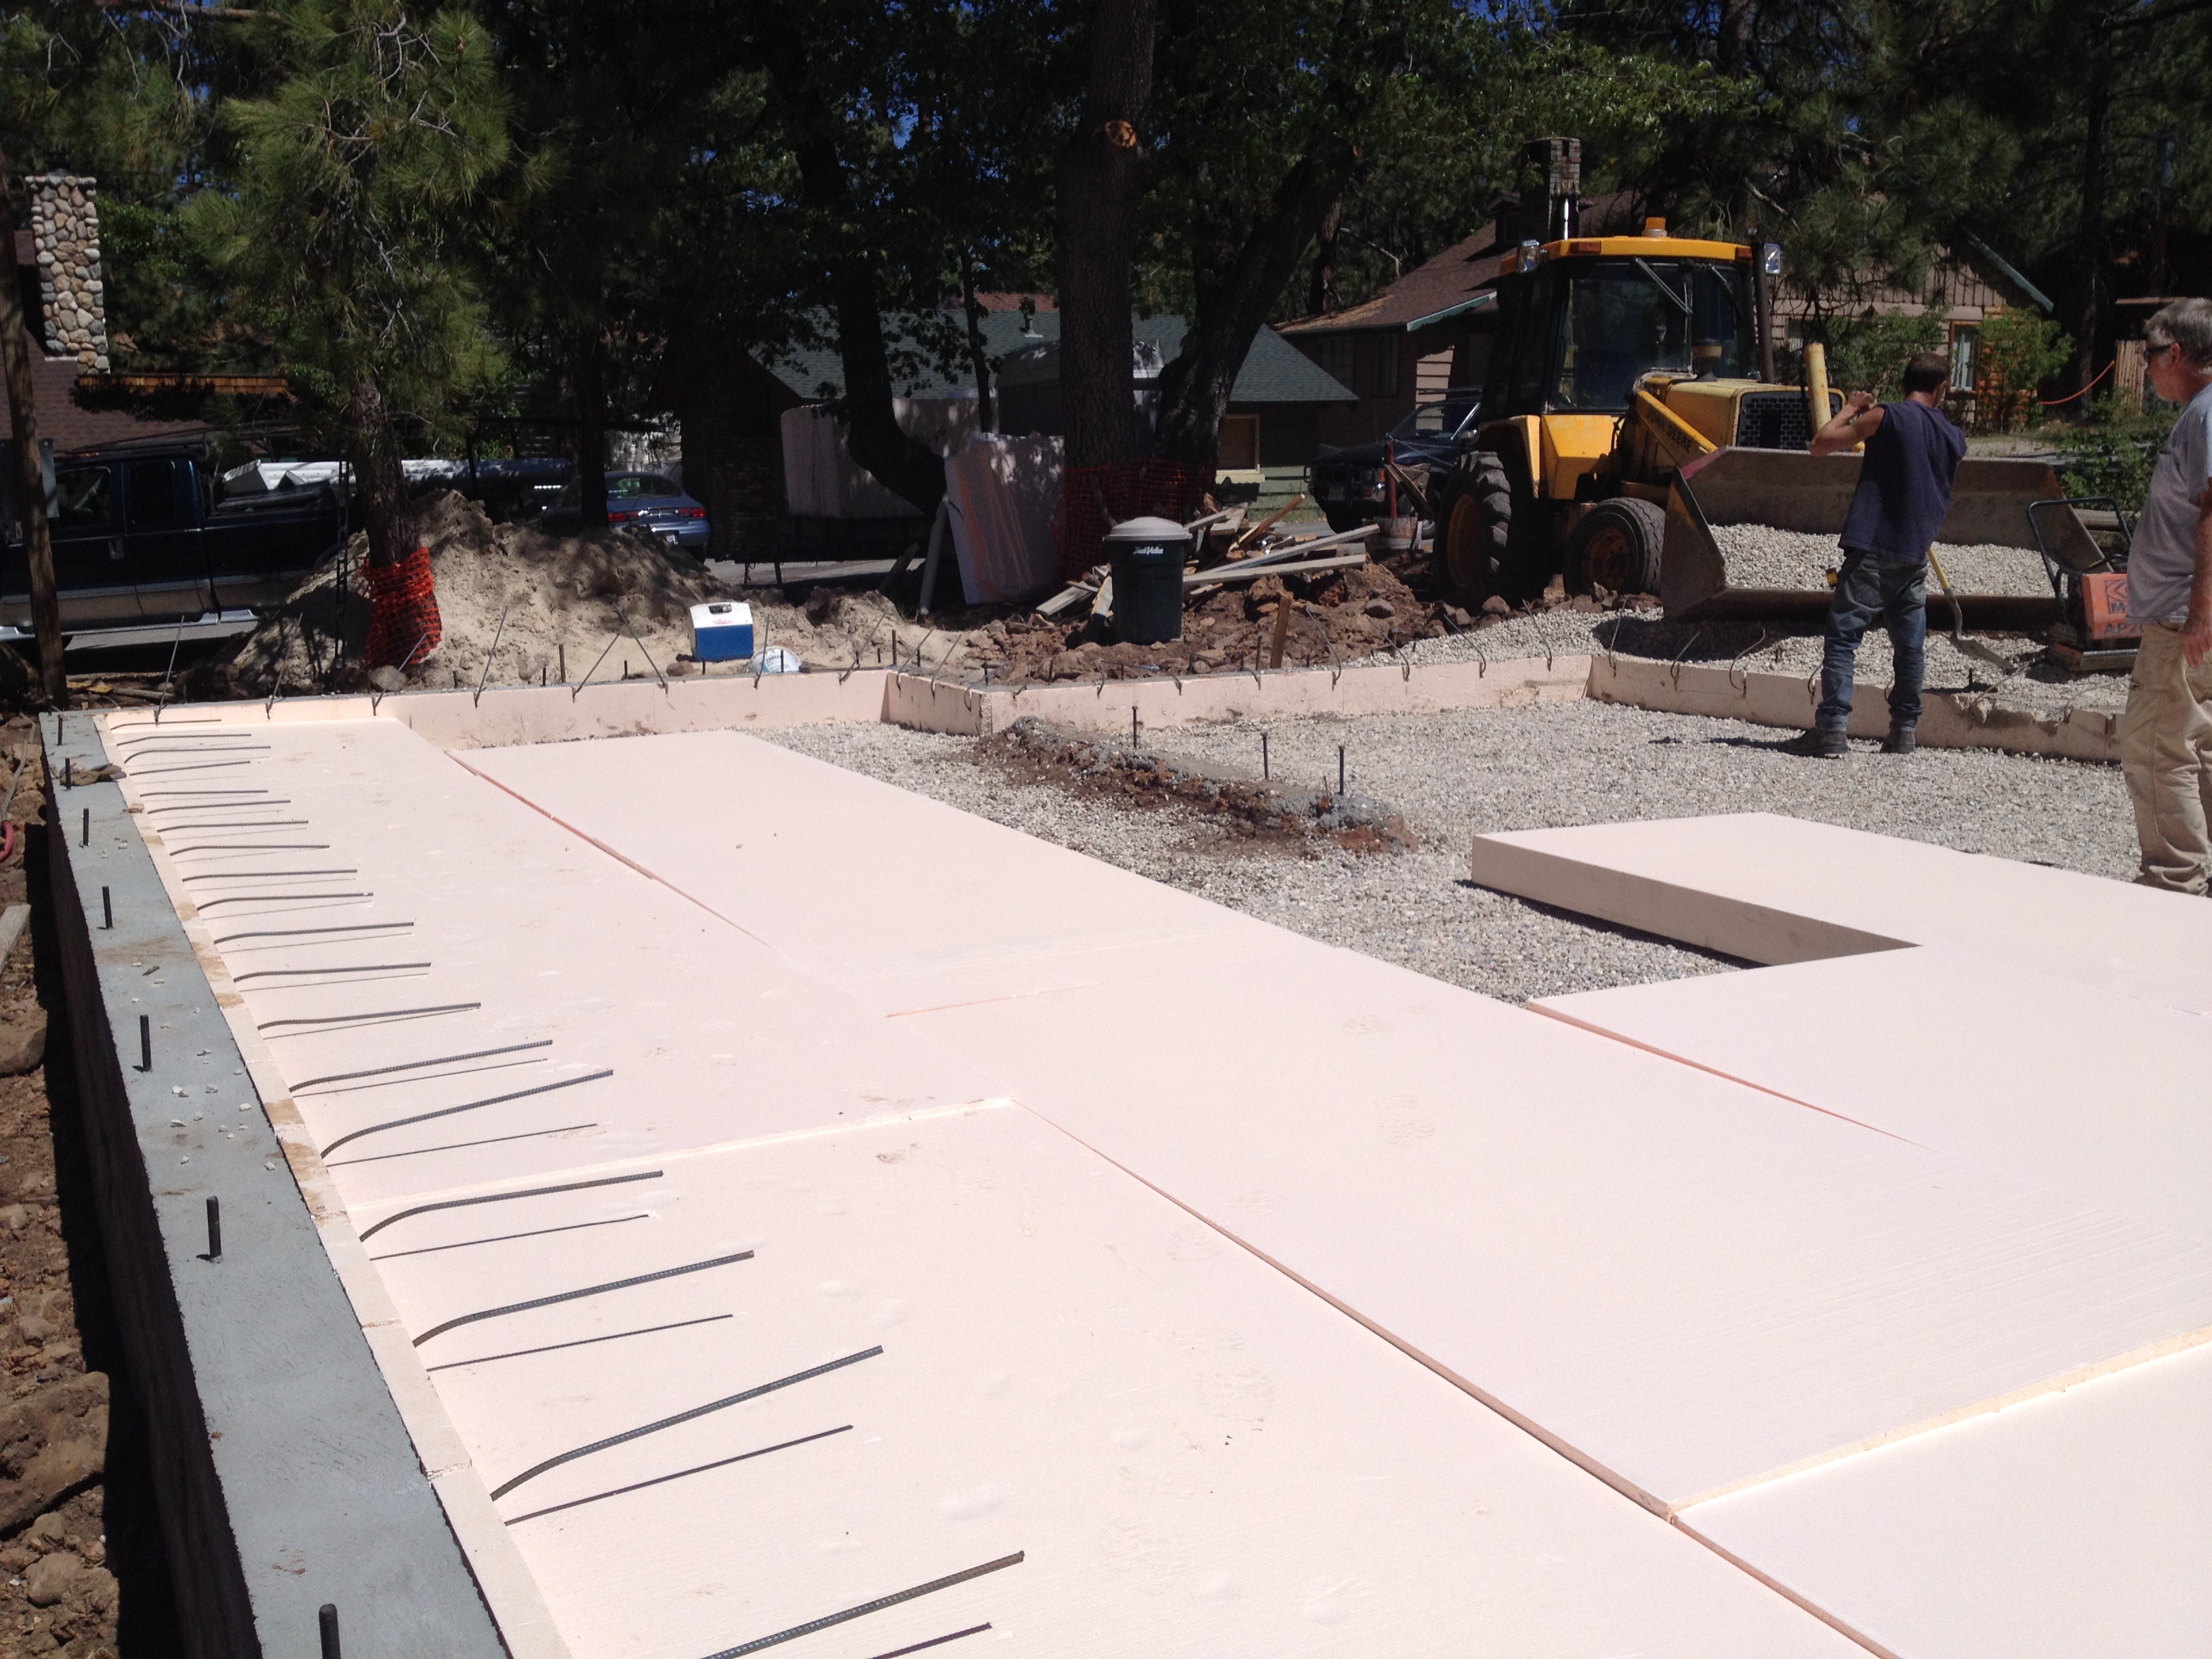
Passive solar works better when there is a large, insulated interior thermal mass that can absorb excess heat and re-radiate it when needed. In this case, my thermal mass was my foundation slab, 4 inches thick, covered with brown tile to absorb sunlight and insulated with 6″ of EPS foam underneath. Comprised of 330 cubic feet of concrete, as a thermal mass it can store around 7600 BTUs per Fahrenheit degree. This means as temperatures drop at night, the slab will act as a stored heat source, releasing 7600 BTUs of heat into the interior of the house for every degree in temperature drop. To put this in perspective, this is enough heat to keep the house comfortable, even when it is freezing outside. Of course, the concrete eventually cools off, but it can be recharged by sunlight and warm air from mechanical heating.

Foundation

My initial concept for the foundation was a frost wall, with a concrete slab resting on a continuous layer of foam insulation. Not only is a slab air tight, especially compared to a subfloor over a crawlspace, but it also serves as a thermal mass. If that mass is thermally isolated from the ground, it can help regulate indoor temperatures and even supply heating to the house when paired with appropriately shaded south facing windows.

Wanita-Detailed-Wall-Section
Detailed wall section showing R8 perimeter EPS insulation and R24 below slab.

Step one was to dig out the foundation frost walls, which had to be 3′ below grade so that they were below the frost line. Once the frost walls were formed and poured, the next step was pouring the slab. I had designed the slab so it was insulated with 2” of EPS along the perimeter and 6” underneath. I would have preferred more insulation at the perimeter, but since I didn’t want to leave the EPS exposed on the interior, that was all the room I had to work with, even with 9″ thick walls.

Finding “small” quantities of high density (Type II or greater) EPS insulation rated for subslab uses is not easy, when you live in warm, sunny San Diego, for the simple fact that nobody insulates slabs out here. But eventually I found a distributor which delivered to Big Bear. I used Type II EPS, with a compressive strength of 8.8 psi at 1% deflection. The slab resting on the EPS weights about 0.35 psi so there is a comfortable margin there.

Although my plans called for optional rebar pinning the slab to the frost walls, my inspector required it because of the clay content in the soil. And although structurally it was the right call, I was worried about the rebar penetrating the EPS, and short circuiting my continuous layer of insulation.

However, it wasn’t as big a deal as I had feared. EPS has an R-Value of R4 per inch at 7 degrees F, which is the Manual J design temp for Big Bear. Because the slab is only 4” thick, the total surface area of the perimeter EPS is only 50 sq ft. So with a U value of 0.13 and a delta T of 60 degrees F (67 – 7), the EPS would lose 375 BTU per hour. The 1/2” rebar penetrates the insulation 98 times, but each cylindrical bar has a surface area of only 0.75 sq in, so the total surface area for all the bars is only 0.5 sq feet. But since the R value of steel is 0.0381, I’d still lose 417 but/hr through the steel, so it cuts the performance of my perimeter slab insulation in half. However, the steel and EPS combo still outperforms plain concrete by a factor of 15.

IMG_2324First the perimeter 2” insulation was installed on the inside of the frost walls, to a depth of 24″. Then the pad was compacted, and 2” of crushed gravel was applied. The 6” thick 4’x8′ EPS panels were installed in a brick pattern. Holes around plumbing penetrations were sealed with spray foam. Then a sheet of poly was spread over the EPS before the slab rebar was attached to the frost wall rebar, and finally the concrete was poured into what amounted to a giant EPS form.

Air Sealing

I found the tops of the frost walls to be pretty rough, and even though I was planning on using a sill gasket from Conservation Technologies, I decided to use an angle grinder to smooth and flatten the concrete under my sill plates as much as possible.

Foundation bolt in frost wall, with rough concrete surrounding it.
Frost wall smoothed out with angle grinder, to form a more air tight seal with building gasket.